Dump the Android Freestyle Libre apps
I now have a Google Pixel 10 Pro Ultra Watch and a Google Watch 4. I also have diabetes, and use the Abbott Freestyle Libre 3+ sensor to continually monitor my blood sugar. Unfortunately, the new Libre and older Libre 3 Android apps drain my phone battery in just 9 hours, even when I am not using the phone actively! This is unacceptable.
There are also issues with the sensor itself giving false low blood sugar readings—these may have killed 7 people. I recently experienced this again using a sensor that was not recalled, so have a finger stick sensor handy to double check the Libre 3+. But this is not the subject of this blog...
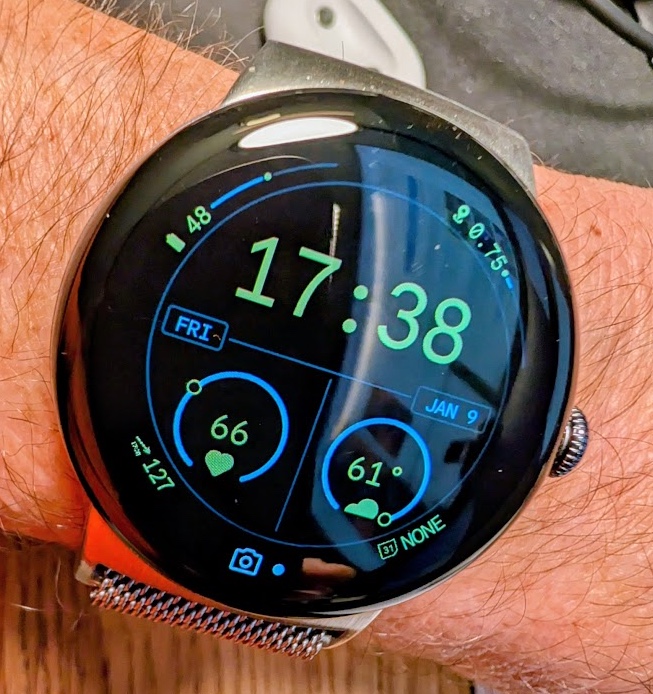
Fortunately, there is a free Android app called Juggluco, that runs on my phone and on my watch. As you can see, the lower left of my Adventure watch face displays my blood sugar and an arrow to indicate whether it is increasing, decreasing, or remaining steady.
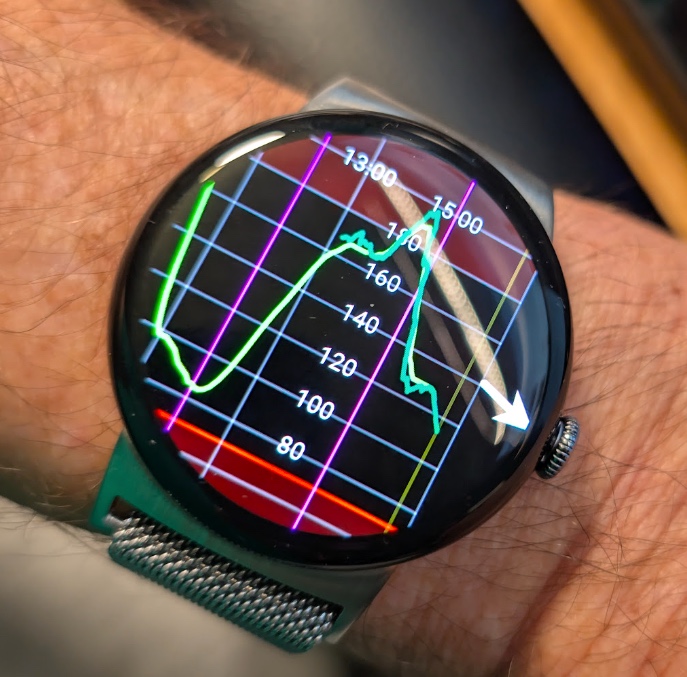
If you tap on the Blood sugar reading, it opens the full blood sugar graph on phone:
Gemini pro told me that the app had to be sideloaded, and it took me a day to do so. But now the apps (for phone and watch) are in the Play store, so it is much simpler to install. BUT, it will be much easier if you do this when starting a new sensor; otherwise you will have to link the app to your LibreView account.
How to Get Blood Sugar Readings on the Pixel Watch 3 of 4 (Adventure Face)
Using the Juggluco App (Now on the Play Store)
If you want to display your blood sugar (from a CGM like Dexcom or Libre) directly on your Pixel Watch 3 "Adventure" face without using complex bridge apps, here is the complete setup guide from Gemini Pro.
Phase 1: Installation (The Easy Way)
-
Phone: Download Juggluco directly from the
Google Play Store -
Watch: Open the Play Store on your Pixel Watch, search for "Juggluco," and install it there as well.
-
Note: You must have the app installed on both devices for this to work.
-
Phase 2: Syncing the Data
-
Configure the Phone:
-
Open Juggluco on your phone.
-
Go to the Left Menu and select Watch.
-
Ensure the box for "Android Wear" is checked.
-
Important: Do NOT check "Send to Glucodata" (this is for other apps and isn't needed here).
-
-
Verify the Connection:
-
Open the Juggluco app on your Watch.
-
Wait a few seconds. It should sync and display your current glucose number and graph.
-
Phase 3: The "Restart" Trick (Crucial Step)
Most users get stuck here because the watch face doesn't see the new app immediately.
-
Once the app is working on the watch, Restart your Pixel Watch.
-
How to restart: Hold the Crown + Side Button together until the menu appears, then select Restart.
-
-
This forces the watch system to re-scan for new complications.
Phase 4: Setting up the Adventure Watch Face
-
Long-press your current watch face.
-
Tap the Edit (pencil) icon on the Adventure face.
-
Swipe to the Complications screen.
-
Tap the Outer Rim slot (or any slot that supports text/values).
-
Scroll through the list until you find Juggluco.
-
Select Value.
-
Result: You should now see your Glucose Number + Trend Arrow curved along the edge of the watch face.
-
But, the glucose alarm values from the phone app are NOT automatically sent to the watch, so you must set them on the watch.
Setting alarm levels in Juggluco on a Pixel Watch can be tricky because the app uses a unique "hidden menu" interface rather than standard buttons.
Here is how to set your high/low alarm thresholds directly on your Pixel Watch 4.
1. Open the Menu
The hardest part is just finding the settings. Juggluco divides the watch screen into invisible "touch zones."
-
Open the Juggluco app on your watch.
-
Tap the far left edge of the screen. (Imagine the screen is divided into 4 vertical strips; tap the one on the far left).
-
This should open the Left Menu.
2. Navigate to Alarm Settings
Once the menu is open:
-
Scroll down and tap Settings.
-
Tap Alarms.
-
You will see options for Low and High.
3. Adjust the Levels
-
Tap Low (or High).
-
You will see a number pad or a slider (depending on your specific version).
-
Enter your desired glucose level (e.g., 70 mg/dL for low).
-
Important: Make sure the Enabled checkbox (or toggle) next to that specific alarm is actually checked.
Troubleshooting
-
If the menu won't open: Try swiping from the left edge toward the center, or tapping repeatedly on the very edge of the 9 o'clock position.
-
Sound vs. Vibrate: In that same Alarm menu, check if "Vibrate" is enabled. On a Pixel Watch, vibration is often more reliable than sound, especially if your watch is in "Theater Mode" or "Do Not Disturb."
-
Phone vs. Watch: If you are using your phone to send data to the watch (Mirror mode), it is often easier to change the alarm settings on your phone's Juggluco app. Those settings usually sync over, or you can set the watch to just "mirror" the phone's notifications. (This did not work for me.)
Troubleshooting Tips:
-
If the list shows "Waiting...": Give it 5–10 minutes for the next sensor reading to push through.
-
Interactive: The number on your watch face is also a button. Tap it to instantly open the full graph view.
Here is the Juggluco display on my phone:
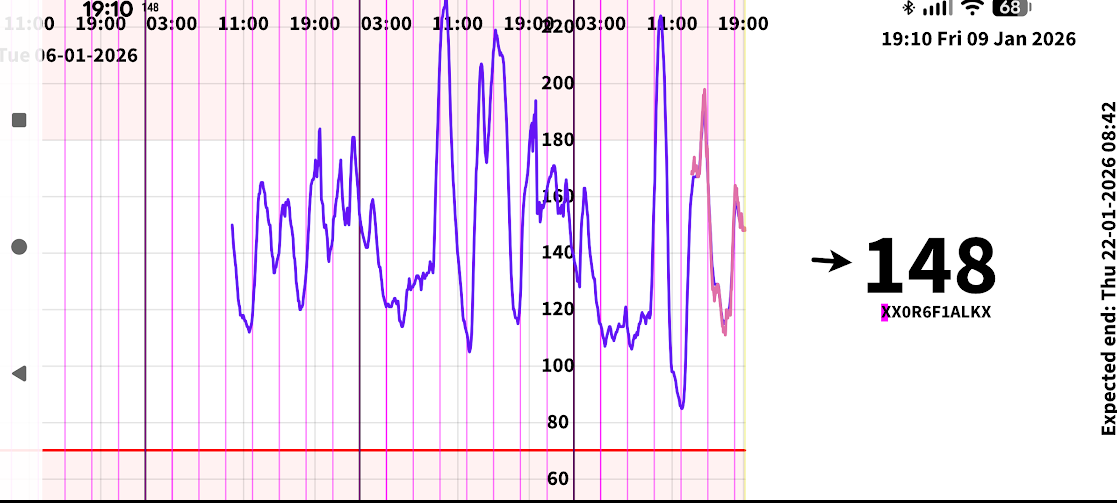
It is not the prettiest app, but it has MUCH more functionality than the Libre apps. It automatically displays my blood sugar in the lock screen, and it remembers your blood sugars for many weeks (not sure how long).
The Juggluco menus are accesses by tapping an empty spot in the top-left of the sugar graph:

Here is the official Juggluco Web page.
Juggluco alarms are loud and also vibrate your watch. The end-of-sensor alarm is a bell that repeats every second or so. It took me a while to figure out where this bell was coming from because Juggluco was running in the background. The low blood sugar alarm is a whooping siren that will wake the dead or scare the living to death. But that is required to arouse you if going into a coma.
juggluco on newer pixel phones
question, I used Juggluco for years with libre 2, worked flawlessly. Now switched to Libre 3. Tried starting one sensor with Libre 3 app, then take it over with Juggluco, it all appears to work but after 60 m warm up no readings. Next sensor I tried starting directly with Juggluco, all again appeared fine, but again no readings. after much research geminin tells me the Google Tensor chip in newer phones has strict bluetooth protocols, preventing transfer of 3rd party "handshake" data, so no matter what Juggluco wont work on newer Google phones...but it appears you have it working? I am in Canada, dont know if that makes a difference, I chatted with juggluco developer and he has no answers.
HELP!
chrisheidt@outlook.com
Juggluco works on my Pixel 4…
Juggluco works on my Pixel 4 watch and Pixel 10 Pro XL phone.
Try using Google Gemini to fix the configutation. It is very familiar with Juggluco.
Add new comment